Wednesday, June 5, 2013

Card Sketch # 11

           Card sketch done by Sue Lorang (Sue4stampin) with MS Word

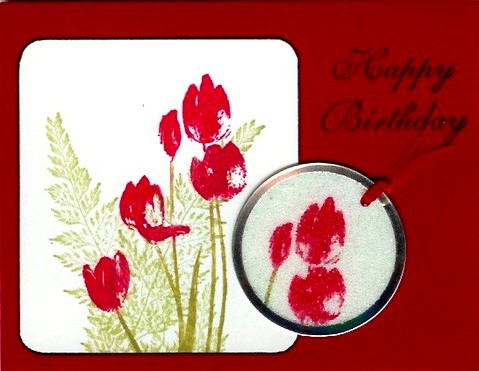
          Card made by Sue Lorang (Sue4stampin) with micro beaded tag

Monday, February 27, 2012

Want to join my Washington State Yahoo Stamping group?

http://groups.yahoo.com/group/washingtonstampersunited/

We have a small stamping group that has fun sharing ideas and techniques, plus solving stamping related problems.

We have a technique to try every Tuesday, a Friday 5 (info to share for fun ), card swaps and a Homepage Art contest once a month.

Tuesday, March 1, 2011

Heated Pearls

Heated Pearls Technique Class
by Sue Lorang (Sue4stampin)

Supplies:
White, Black or Colored Cardstock (Glossy or Matt) 4” x 5 1/4” Plus Enough to Decorate
White School Glue
Pearl Ex, Perfect Pearls, or any brand Mica Powders:
Brushes
Paper Towels
Cup of Water
Punches to Decorate Cards

Instructions:

1. Take some white glue (clear drying like Elmer’s School Glue) and spread it all over your cardstock. I used 4 1/4 x 5 1/2 size cardstock.

2. Dip a paint brush into your powdered Pearl Ex or other powdered pigment and tap the brush with your finger to sprinkle the powder onto your glue. A Little goes a long way. (I use three colors).

3. Mix it around with your finger or brush, but I like my finger so it doesn't leave brush strokes. You can also pounce the glue and Pearl Ex powder with a brush for a different texture. Be careful not to mix too much or your colors will get all muddy. Once it is mixed, heat it with your heat gun till it stops bubbling. Don’t overheat or it will scorch.

4. Punch or cut out your pieces to decorate your card and layer your pieces to complete the cards.


Pink Heated Pearls & Beaded Heart Card

by Sue Lorang (Sue4stampin)

Supplies:
Heart Stamp by Hampton Art Stamps
Pink Ink Pad by Impress in Old Rose
Pink Bazzill Cardstock 4 1/4” x 5 1/2” Plus Enough to Punch a 1 3/4 Square
White Matt Cardstock 4” x 5 1/4” with heated Pearls Technique
Enough White Matt Cardstock to Punch a 1 1/2 Square
White School Glue
Pearl Ex Powders: #690 Sparkling Copper, #684 Flamingo Pink & #685 Spring Green
Square Punches
Clear Micro Beads
Double Sticky Tape Sheet

Instructions:

1. Use the Heated Pearls Technique on white cardstock and trim to 4”x 5 1/4.

2. Punch or cut a square of pink that is 1 3/4” .

3. Stamp the heart with pink on the white scrap and punch it to 1 1/2”. Cover it with double sticky tape also punched to 1 1/2”. Peel off the liner and dip into clear micro beads. Press the beads into the tape.

4. Place the beaded heart on the pink square and then on the top left corner of your Heated Pearls card front. Layer the card front on to the pink cardstock.


Copper Heated Pearls with Punched Leaf

by Sue Lorang (Sue4stampin)

Supplies:
Leaf Punch by Marvy
Black Matt Cardstock 4 1/4” x 5 1/2”
Black Matt Cardstock 2 3/4” x 4 1/4” with heated Pearls Technique
Enough Black Matt Cardstock to Punch the leaf
White School Glue
Pearl Ex Powders:
#683 Brilliant Yellow, #655 Super Copper & #664 Super Bronze
Copper Sharpie Markers

Instructions:

1. Use the Heated Pearls Technique on black cardstock and trim to 2 3/4” x 4 1/4”.

2. Punch out your leaf and mark edges with copper Sharpie marker.

3. Layer the copper Heated Pearls onto the matt black card front and then adhere the punched leaf piece at an angle.

Monday, September 14, 2009

Trying to do too many things at once

I have been busy remodeling my house, buying property in Moses Lake and having company this summer to keep up with everything. Blogger and Facebook are taking a back seat so I can do my best at keeping my Washington state stamping Yahoo group from falling behind. If you want to see more up to date techniques & tips, check out my stamping group. You don't have to live close bye, but know that when we talk stamp stores or conventions that it will be in the WA state area. http://groups.yahoo.com/group/washingtonstampersunited/

Thursday, February 5, 2009

Technique & Card Sketch # 10

Card sketch done by Sue Lorang (Sue4stampin) with MS Word

Card made by Sue Lorang (Sue4stampin)
Quilted Card Directions
by Sue Lorang (Sue4stampin)
1. Pick out some scrapbook paper scraps that coordinate with each other. If you are using three patterns punch 6 of each. For two patterns (like I have here) punch 10 of each. I stamped and colored images for half the squares on my card.
2. Work out your quilt pattern on a coordinating color of cardstock with a small amount of repositionable adhesive on the back of your quilt blocks.
3. When your design is set. Use a good adhesive to secure your quilt blocks
4. Using three of the colors, cut two 2 inch squares and one 1 3/4 square. Adhere to the card front as shown.
5. I stamped & colored my image for the smaller square, but you could always put a bow or embellishment on the smaller square.
6. To make it look more like a quilt, I made stitch marks around each block with a black pen and chalked around the main image piece.

Two Tips that work well together

Card Size & Envelope to Try
I found two tips that work great together.

From Nichole Heady:
My new favorite card size is 3 1/2" x 4 1/4". They are so cute AND cost efficient. From an 8 1/2" x 11" piece of paper I can make three cards.

Note from Sue: Cut your 8 1/2" x 11" cardstock every 3 1/2" down the page and when each piece is folded it will be 3 1/2" x 4 1/4". You will have a 1/2" strip left over.


For an Envelope to fit these small cards see Julie Ebersole's BLOG:
'A-2 Envy for a square card'.
http://papertrufflez.typepad.com/paper_trufflez/2006/10/a2_envy_for_a_s.html

Note from Sue: You will have to adjust the size of the paper inserted into the envelope to 2" wide X 4 1/8" long to properly fit with the 3 1/2" x 4 1/4" card.

Monday, February 2, 2009

Card Sketch #9

Card Sketch by Sue Lorang (Sue4stampin) using MS Word

Card made by Sue Lorang (Sue4stampin)
Here is a valentine sketch card that can be done with any punch or die cut. Just punch out your design and attach it to the cut out with a piece of ribbon. Layer it onto your card front, add a sentiment and you have a quick and easy card.

Thursday, January 29, 2009

A Tip to Share

Ribbon from Fabric
by Annette Warkentin

Fusible webbing or freezer paper can be ironed to the back of a strip of fabric, cut in widths and used in your art. Guillotine paper cutters and rotary trimmers work well to cut the fused fabric.
Happy stamping,
Annette Warkentin

OSA's website home page
http://www.orientalstampart.com/

OSA's Yahoo group
http://groups.yahoo.com/group/OrientalStampArt/members

Another Idea to Try

If you like Copics or want to know more about what you can do with these markers, here is a blog that has over a years worth of entries just on techniques for using Copic markers.

Copic Markers – Tutorials
by Debbie Olson
http://ilikemarkers.blogspot.com/

Thursday, January 22, 2009

Card Sketch #8

Card sketch drawn by Sue Lorang (Sue4stampin) with MS Word

Card made by Sue Lorang (Sue4stampin)
This card was made by Paper Piecing 3D layers on the dress. For directions on this blog go to
The stamp is by Frantic Stamper and can be found here.

Another Tip to Share

I got this tip from Annette and she was nice enough to give me permission to share it.


Float off used postage stamps for collage or backgrounds
by Annette Warkentin

Float used/canceled postage stamps off envelopes by placing the stamp face down in warm, soapy water. Wait a minute or two and the stamp will float off the envelope. Dry between weighted paper towels. Your canceled stamps are ready to use in collage or to make a montage, scan, print and use as backgrounds. Be sure that the scanned stamps are not complete so copyright laws are addressed. Overlap the stamps a bit, be sure the canceled portion is visible and if in doubt, go to the USPS website to check out their policy.
Happy stamping,
Annette Warkentin

OSA's website home page
www.orientalstampart.com

OSA's Yahoo group
http://groups.yahoo.com/group/OrientalStampArt/members

Tuesday, January 20, 2009

Another Try This Idea

FOUND-OBJECT PRINTING
by Mary O'Neil (Hot Potatoes Rubber Stamps)
on DIY

Stamp with Sticky Lint Roller & More
http://www.diynetwork.com/diy/cr_rubber_stamping/article/0,2025,DIY_13775_2270775,00.html

Thursday, January 15, 2009

Card Sketch #7

Card sketch drawn by Sue Lorang (Sue4stampin) with MS Word

Card by Sue Lorang (Sue4stampin)

Here is a card sketch that would work perfect for a man's card with a car image (or any masculine image). But just as great with a pretty floral image and a matching background paper.

Rubber stamps stored correctly

Rubber stamps stored correctly
by Tracy Liu
on http://www.alysta.com/stamping/stamping.htm

If you store your stamps in drawers, make sure that you do not stack them more than 2 high. Stacking them higher than this squishes the rubber on them and is not good for the stamp.

Note from Sue: If stamps are jumbled in a drawer, one stamp can put a dent in the rubber of another stamp.

Tuesday, January 13, 2009

Try This Idea by Deanne Burton


I'm back again

I had a very nice Christmas, but it was a busy time for me. I am back now and have all kinds of new things to share. I am going to try and update at least 2 0r 3 times a week with Tips, Techniques and Card Sketches.
Sue4stampin

Saturday, November 8, 2008

Another Christmas Card Sketch

Card sketch drawn by Sue Lorang (Sue4stampin) with MS Word


Cards by Sue Lorang (Sue4stampin)
Here is an easy card front to make. I saw this idea years ago and it is a favorite of mine for Christmas cards. It can also be used for Birthdays or any gift giving holiday.
I used punched my tags, stamped the images, then attached them when I tied the bows.

The green card was textured cardstock. I used micro beads on the candle and painted the flame with gold Twinkling H2O's.

The gold cardstock was stamped with stars using Brilliance ink. I used the Brilliance Ink for the image on the tag also.

Sunday, November 2, 2008

Another great Tip

Acrylic Block for Larger Stamps
Tip by Trish D. posted on another blog

Have a stamp that is way too big for your largest acrylic block?…

“You can use a cutting plate from the Cuttlebug or Big Shot for those huge acrylic stamps.”

Trish D.
http://trish-d.blogspot.com/

Wednesday, October 29, 2008

A MaryJo McGraw technique

Versa Magic Background
by Sue Lorang (Sue4stampin)

I saw this demonstrated by MaryJo McGraw

1. Squirt drops of Versa Magic reinker in 3 colors onto white cardstock.
2. Brayer till the whole card is covered.
3. Take a stamp and swirl it on the ink.
4. Let dry completely

Wednesday, October 1, 2008

A Card Sketch for Christmas or Winter Cards

Drawn by Sue Lorang (Sue4stampin)


Here are 2 cards I made with this sketch. This is so easy and I think it makes a very cute Christmas card. You punch out the snowflakes from the colored cardstock, put on a white card and add 3 of the snowflakes to the white image piece.
Sue Lorang (Sue4stampin)